Back to Blogs
How to Connect Google Drive in TenseAI and Create Folders Automatically
Tech

How to Connect Google Drive in TenseAI and Create Folders Automatically

Learn how to connect Google Drive with TenseAI and automate file and folder management using simple commands.

TenseAi Developer Team

TenseAi Developer Team

Apr 07, 2026
8 min read

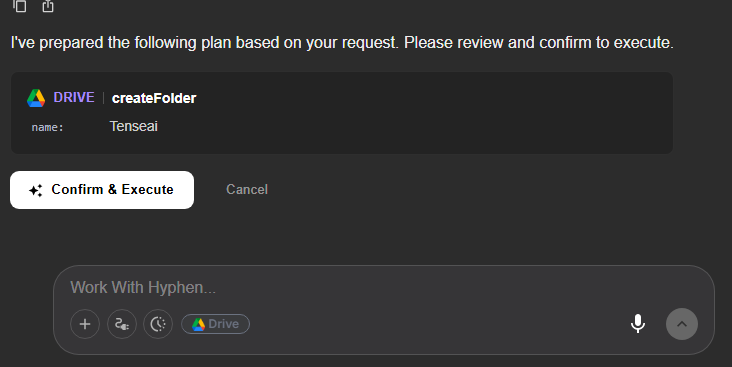
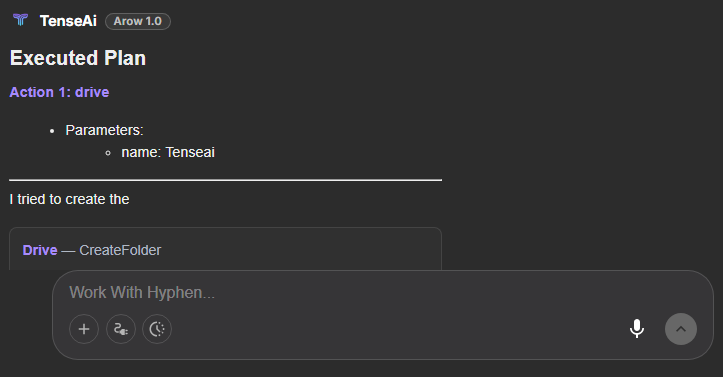
"Google Drive integration with TenseAI makes file and folder management simple, fast, and fully automated. Instead of manually creating folders or organizing files, users can just give a prompt, and TenseAI handles everything—from understanding the request to creating folders instantly. This smart automation saves time, reduces repetitive work, and improves productivity, making it easy to manage project files and organize data efficiently."

TenseAi Developer

📊 Workflow Flowchart:

Drive Workflow Flowchart

Step 1: 🔗 Connect Google Drive

Connect Drive

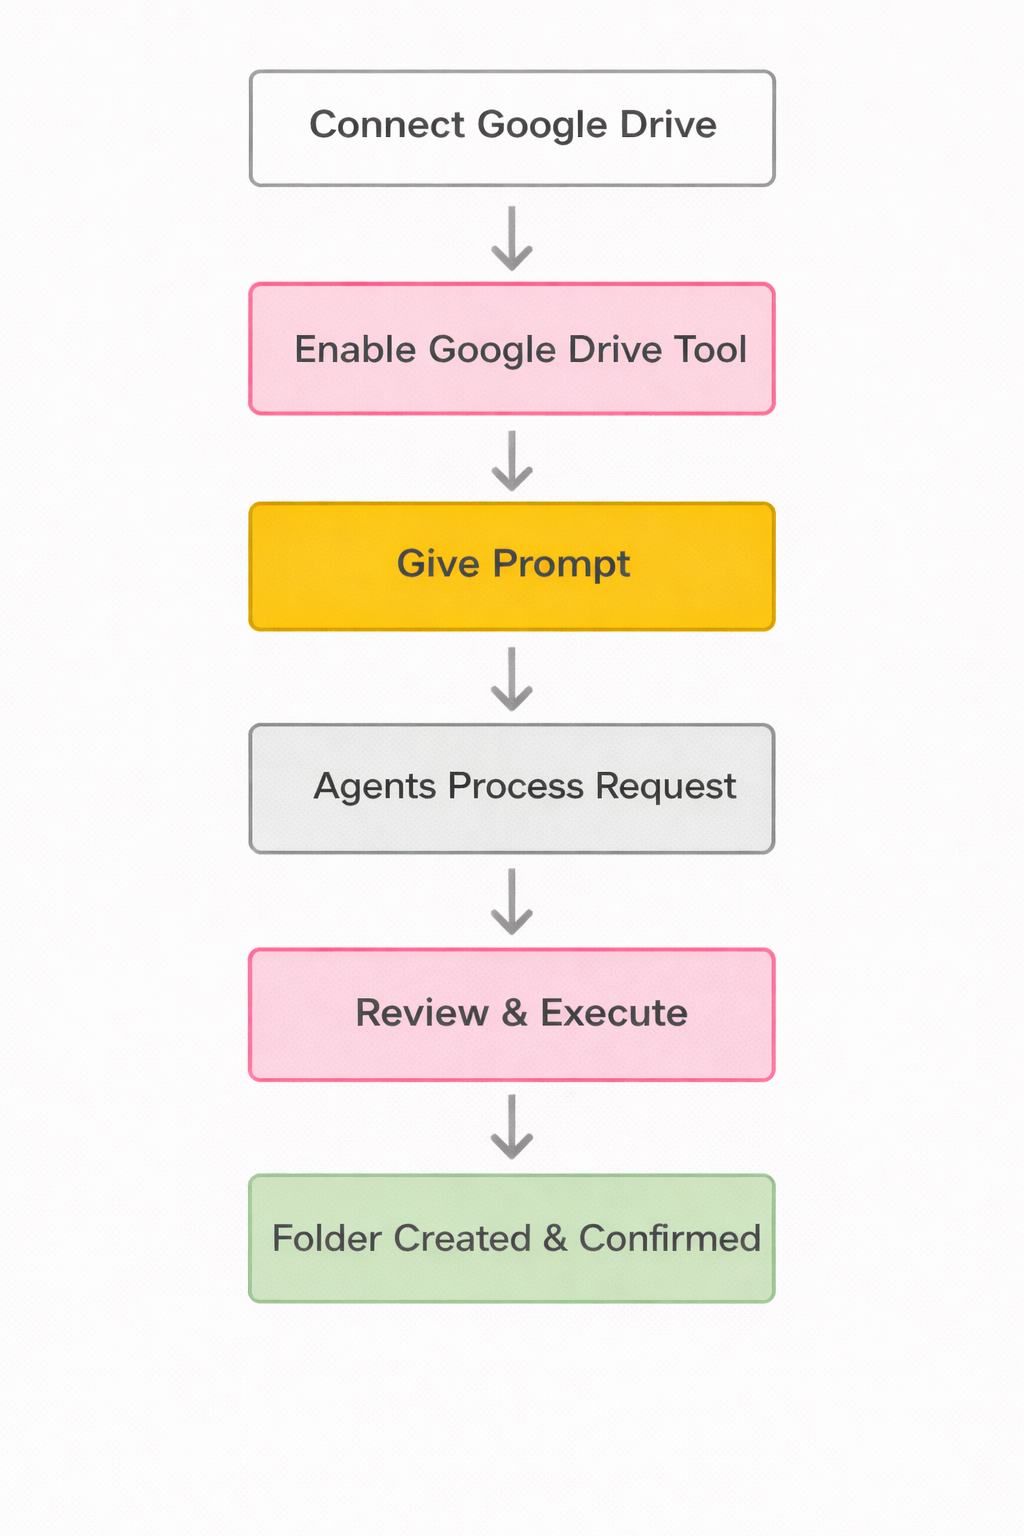
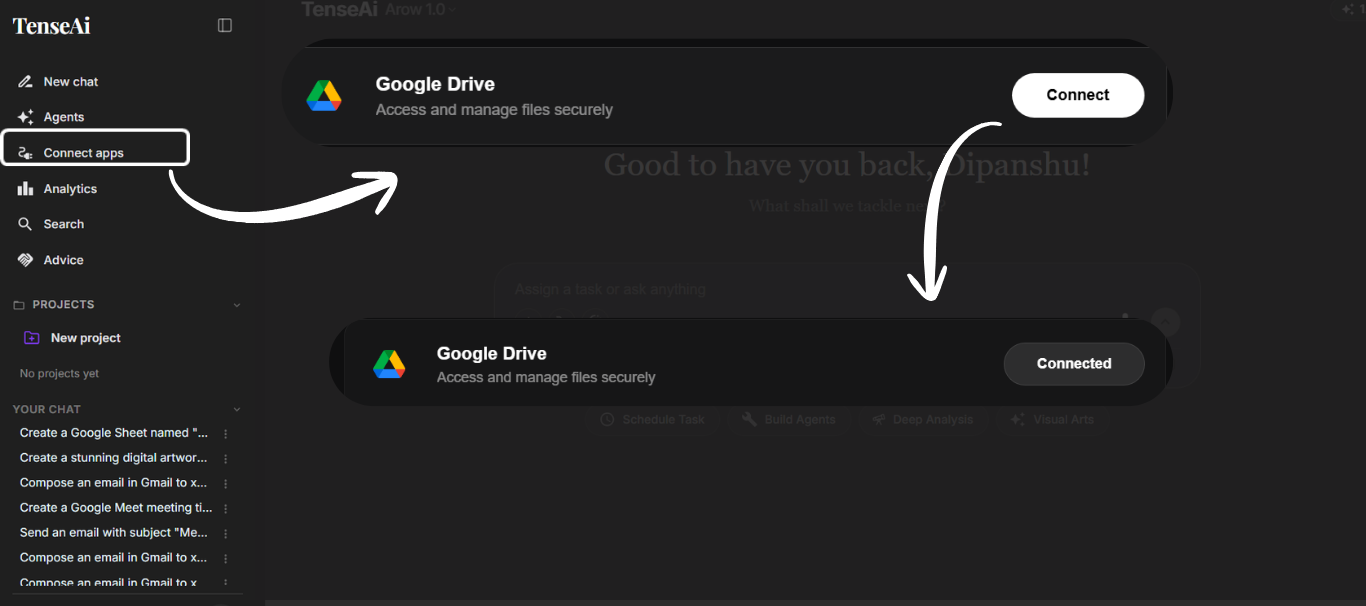
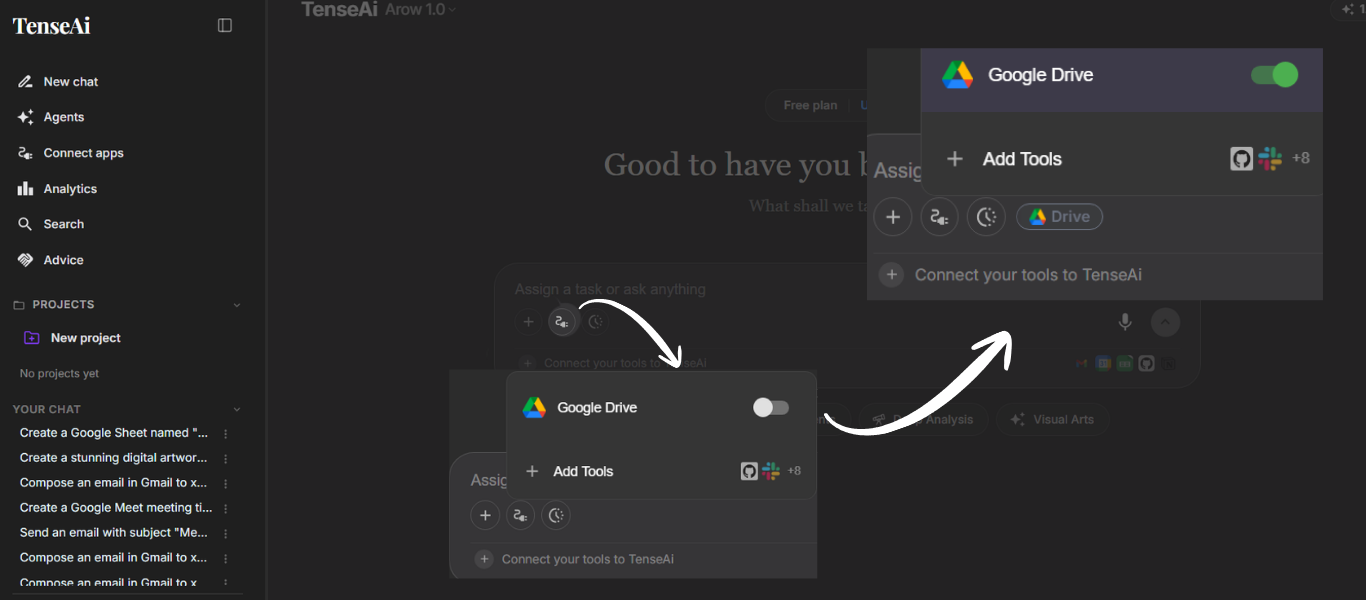
To connect Google Drive with TenseAI, simply click on the Connect button from the Tools section and sign in with your Google account. After granting the required permissions, a secure connection is established that allows TenseAI to create folders, upload files, and manage your data automatically. This step ensures safe access and enables smooth Google Drive automation for efficient file management.

Connect Drive

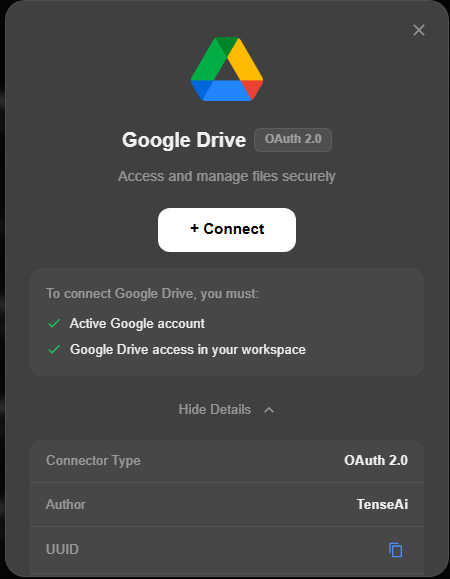
This screen shows the secure Google Drive integration process in TenseAI using OAuth 2.0 authentication. By clicking the Connect button, users are redirected to the Google sign-in page where they can log in and grant the required permissions. With an active Google account and Drive access enabled, the connection is established safely and transparently. Once connected, TenseAI can automatically create folders, manage files, and handle data efficiently, making Google Drive automation smooth and reliable.

Step 2: ✅ Enable Google Drive Tool

  • After connecting Google Drive with TenseAI, the next important step is to enable it from the Tools section to activate file automation. Simply turn the toggle ON, and once it becomes active, TenseAI can access Google Drive features to create folders, upload files, and organize data automatically.
  • This step is essential because without enabling the tool, the integration will not work. Activating Google Drive ensures a smooth, efficient, and fully automated file management workflow.
Enable Goggle Drive Tool

Step 3: ✍️ Give a Prompt

  • In this step, users can simply type a natural language prompt to create a Google Drive folder using TenseAi. There’s no need for any technical syntax—just write what you want, like creating a folder with a specific name. TenseAi understands the request instantly, identifies the task, and captures key details such as the folder name.
  • This makes Google Drive automation easy, user-friendly, and efficient, allowing users to manage files without any manual effort.
Drive prompt

PROMPT:

Recommended Prompt

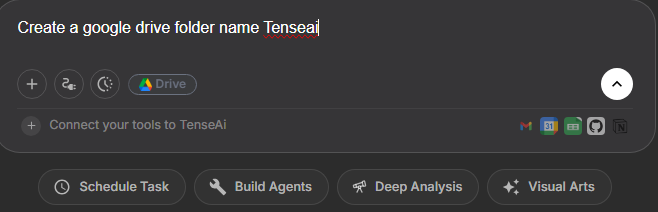
Create a Google Drive folder named ‘TenseAi’

Step 4: ⚙️ Agent Processes the Request

  • In this step, TenseAI intelligently analyzes your prompt and converts it into structured data for accurate Google Drive automation. It understands your intent and extracts key details like the folder name and required action.
  • All the information is then organized in a clear format, allowing the system to create folders quickly and efficiently. This automated process ensures accuracy, saves time, and makes file management completely hassle-free.

Step 5: 👁️ Review and Execute

  • In this step, TenseAI shows a clear preview of your Google Drive action, including details like the folder name before execution. You can review everything carefully, make changes if needed, or cancel the request.
  • Once you're satisfied, simply click ‘Confirm & Execute’ to create the folder. This step ensures accurate folder creation, gives you full control, and makes the Google Drive automation process smooth and reliable.
Execute

Step 6: 🎉Folder Created & Confirmed

  • In the final step, TenseAI completes the Google Drive automation by creating your folder instantly after you click ‘Confirm & Execute’. Once the process is done, a confirmation message is displayed, ensuring that the folder has been created successfully without any errors.
  • This step confirms that your file management workflow is complete and your folder is ready to use, making the entire process fast, accurate, and hassle-free.
Folder Created